

Appearance
Create tags
A tag is a named value that Nexus keeps current. Screens, alarms, history and scripts all work through tags.
Tags live in a provider. Every Nexus starts with one, [DEFAULT], and a tag's full path names the provider in brackets, then the folders, then the tag:
[DEFAULT]Tank/LevelThis tutorial uses memory tags: tags that hold whatever value was last written to them. They need no device, which makes them the right place to start. When you connect real equipment later, you create device tags instead, and the rest of what you build here works the same way.
Open the Tags tab. The provider list at the top shows DEFAULT, and the tree below it is empty.
Make a folder
- Click the + button beside the filter box and choose Add Folder….
- Enter
Tankas the Folder name and click OK.
Make the two tags
Create the tank level:
- Right-click the Tank folder and choose New Tag Here....
- Studio asks one question at a time. Answer each and click OK:
- Tag name:
Level - Data type:
Float - Initial value:
20 - Tag group: leave it at
default.
- Tag name:
Then the pump, the same way:
- Right-click Tank and choose New Tag Here....
- Tag name:
PumpRun, Data type:Boolean, Initial value:false, Tag group:default.
Expand Tank to see both, with their current values.
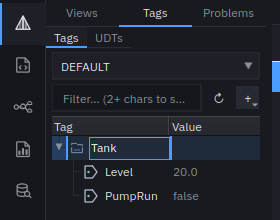 Both tags, in the Tank folder.
New Tag Here, not New Tag
A folder's right-click menu offers both. New Tag Here..., near the top, creates the tag inside the folder. New Tag..., near the bottom (and on a tag's own menu), creates it at the top of the provider, as [DEFAULT]Level instead of [DEFAULT]Tank/Level, and nothing later in this tutorial would find it. The + > Add Tag menu also creates at the top of the provider.
Record the level's history
The trend you add later draws from history, so Nexus has to record it.
- Right-click Level and choose Edit Tag…. The Tag Editor opens.
- Open the History category.
- Tick Enable history.
- Leave Historian at (provider default). That is the historian built into Nexus; it needs no database server.
- Click Save.
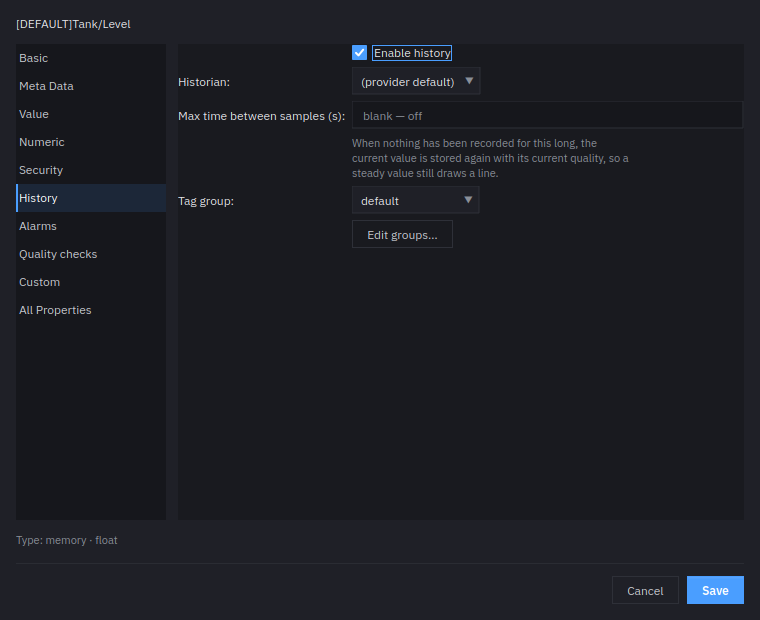 History, enabled on the level.
Nexus starts recording Level straight away. No restart is needed for this or anything else in the Tag Editor.
Add a high-level alarm
- Open Edit Tag… on Level again, and go to the Alarms category.
- The category lists four alarm limits:
hiHi,hi,loandloLo. Scroll to hi and:- tick Enabled,
- set Setpoint to
70, - leave Mode at Above setpoint,
- set Priority to
high, - set Message to
Tank level high.
- Leave the other limits disabled, and click Save.
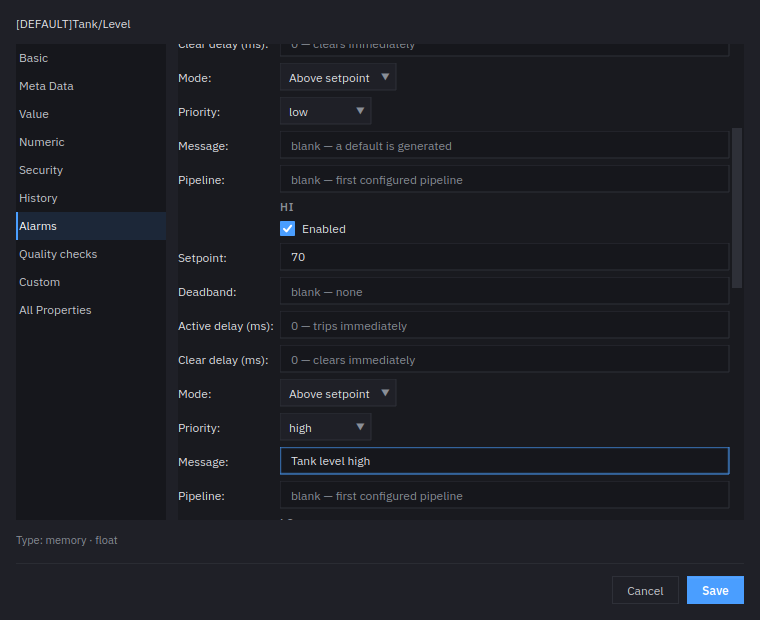 The hi limit, filled in.
The alarm becomes active whenever Level is above 70, and clears when it drops back.
Where alarms go
The Pipeline field decides who is notified when the alarm fires, by email, SMS or voice. Leave it blank for this tutorial: the alarm is still raised and still shows on screen. Setting up notification is covered in Alarm notification.