Appearance
Build the screen
A screen in Studio is a view. You add components to it, then bind each component to a tag, so the component shows the tag's value, or writes to it, or both.
Create the view
- Choose File > New View... (Ctrl+N).
- In the New View dialog:
- Name:
Overview - Root Container Type: Coordinate Container, so you can place components freely.
- Leave Create page at URL ticked. It gives the view an address in the running project, so operators can navigate to it.
- Name:
- Click Create View. It opens on the canvas.
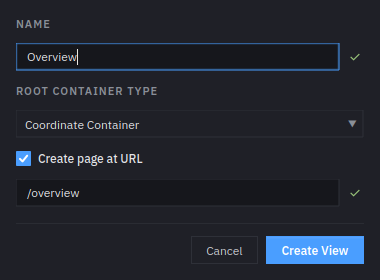 New View. The page address fills in from the name.
Add the components
Open the Components tab (bottom right, beside Properties). Add each of these by double-clicking it in the palette, then drag it into place on the canvas: each new component lands a little below and to the right of the last one, so they start out overlapping. The search box at the top of the palette finds a component by name.
| Component | For |
|---|---|
| Tank (under Symbols) | Shows the level. |
| Slider | Sets the level. |
| Toggle | Starts and stops the pump. |
| Trend Chart | Draws the level's history. |
| Alarm Table | Lists active alarms. |
A layout that works: the tank on the left, the slider and toggle beside it, the trend across the top right, and the alarm table along the bottom.
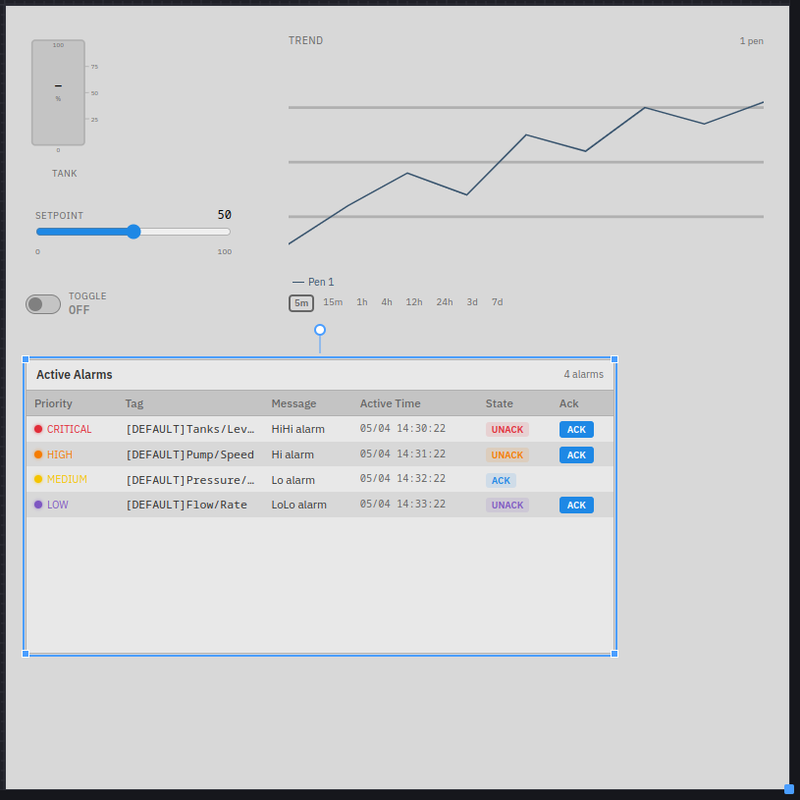 All five placed. The trend and alarm table show sample data until they are live.
Bind the tank
- Select the Tank.
- In Properties, find the Value row and click the link icon at its left edge. The Binding Manager opens.
- Choose Tag.
- Enter the tag path
[DEFAULT]Tank/Level. - Click Apply.
![The Binding Manager on the Tag page, with the path [DEFAULT]Tank/Level entered and Current Output showing Raw: 20](/manual/img/tutorial/tutorial-binding-tag.png) A tag binding. Current Output shows the live value before you apply it.
A tag binding. Current Output shows the live value before you apply it.
The tank fills to 20%, the level's initial value. The canvas shows live values while you design.
While the tank is selected, set its Text property to Tank 1: that is the caption under it. Its Min and Max are already 0 and 100, and its Unit is already %.
Bind the slider
The slider must write the level as well as show it, so its binding goes both ways.
- Select the Slider and click the link icon on its Value row.
- Choose Tag and enter
[DEFAULT]Tank/Level. - Tick Bidirectional (read-write).
- Click Apply.
Set its Text to Level setpoint and its Unit to %. Its Min and Max already match the tank's.
Without Bidirectional, the slider only displays
A binding is read-only unless Bidirectional (read-write) is ticked. A read-only slider still moves when the tag changes, but dragging it writes nothing to Nexus.
Bind the toggle
- Select the Toggle and click the link icon on its Value row.
- Choose Tag, enter
[DEFAULT]Tank/PumpRun, and tick Bidirectional (read-write). - Click Apply.
Set its Text to Pump. Its On Value and Off Value are already true and false, which is what a Boolean tag holds.
Set up the trend
A trend draws one line, or pen, per tag.
- Select the Trend Chart.
- A new chart already has one pen, Pen 1, with no tag. In Properties, type
pensin the Filter properties… box to find it quickly, then set Pen 1's Tag Path to[DEFAULT]Tank/Leveland change its Text toLevel: that is the name the legend shows. (Don't click + Add Pen; that adds a second, empty pen.) - Clear the filter, then set the chart's Title to
Tank level, and its Default Preset to15mso it opens on the last fifteen minutes.
![The Properties panel filtered to pens, showing one pen named Level with Tag Path [DEFAULT]Tank/Level](/manual/img/tutorial/tutorial-trend-pens.png) Pen 1, now named Level and pointed at the tag.
Pen 1, now named Level and pointed at the tag.
The trend only has history from the moment you ticked Enable history on the level, so it starts out short.
The alarm table
The Alarm Table needs no binding: it lists Nexus's active alarms by default, under the title Active Alarms.
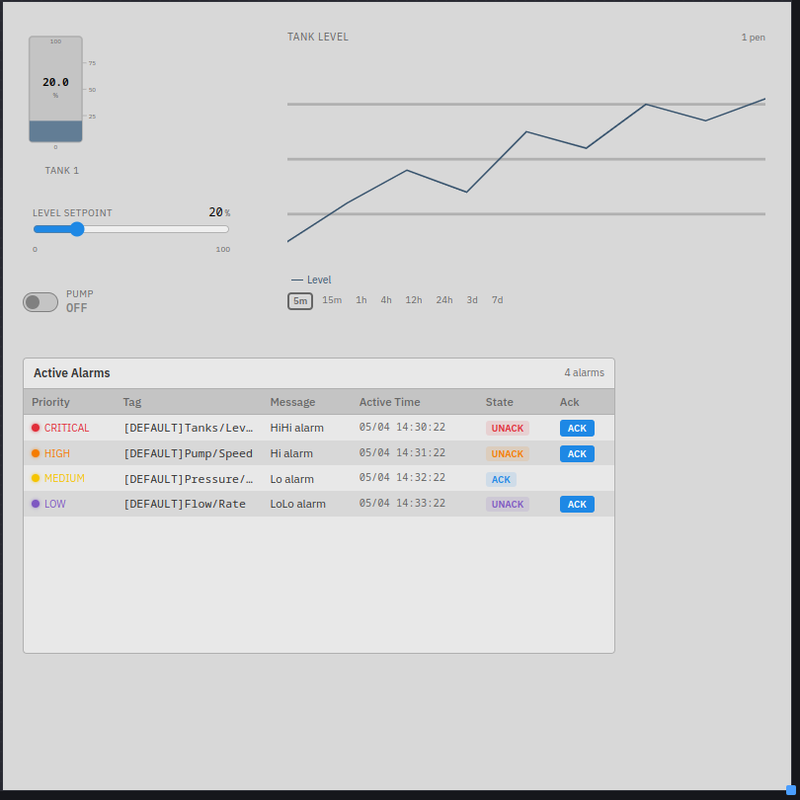 The finished view in Studio, showing live values while you design.